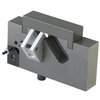
Three-piece, dual purpose jig gives perfectly stoned surfaces with exact 90° cuts every time. Guides stone over all styles of 1911 hammers and sears for a clean-breaking, match-quality let-off. Combination jig/vise holds hammers at the correct height. Plus, locks sear in proper relationship to hammer to make sharp primary/secondary cuts on hammer engaging surfaces. Use 6" x ½" x ½" stone.
Design Unique Maintient à la Fois la Gâchette & le Marteau
Ce jig à trois pièces, à double usage, offre des surfaces parfaitement meulées avec des coupes à 90° précises à chaque fois. Il guide la pierre sur tous les styles de marteaux et de gâchettes 1911 pour un déclenchement net de qualité match. Le jig/étau combiné maintient les marteaux à la bonne hauteur. De plus, il verrouille la gâchette dans la bonne relation avec le marteau pour effectuer des coupes primaires/secondaires nettes sur les surfaces d'engagement du marteau. Utilisez une pierre de 6" x ½" x ½".
SPÉCIFICATIONS : Aluminium durci et anodisé. Environ 4" (10,1 cm) de long, 2" (5 cm) de haut, ¾" (19 cm) d'épaisseur. Comprend des instructions.
Plus...
Évaluations client de BROWNELLS BOB MARVEL 1911 AUTO SEAR & HAMMER JIG
Nombre d'évaluations: 12
De brownells.com: 12
Note moyenne: 3.6
MARVEL HAMMER & SEAR JIG(02.10.2009)
This jig has a problem. When you lightly tighten the sear to the jig, the pin pulls out of the block. I ended up having to drill a hole and thread it. Then placed a threaded plug, which fit against the pin and secured it in place.
Plus it's hard to square hammer hooks when the block is not square. However, after the modification on the pin the sear cuts are clean and smooth.
Needs one improvement(06.12.2009)
I had to add a pin to the sear jig to prevent the threaded rod from pulling out when tightening the nut to secure the sear. The instructions warn you about this happening but it's inevitable - you can't tighten the nut enough to keep the sear in position when stoning, without pinning this rod. I used an ejector roll-pin and cut it to length after installing.
Marvel sear jig can be easily fixed(18.12.2009)
Yes, the sear pin pulls out of the sear attatchment, I found this is easily fixed if you are familiar with staking a hammer strut pin. I staked the threaded pin after using it a few times and the pin started to pull through. Clean the end of the pin and the inside of the hole where the pin is attatched, I put a small amount of 2 part metal epoxy on the end of the pin and staked it on the back side using a standard punch, cleaned up the raised portions of the staked pin, ground it smooth and flat so it wont scratch the jig body. 5 trigger jobs later and the pin has not moved yet. I found the trick is to NOT torque the nut so that the pin has a chance to pull through, I believe it does not take that much to secure the sear to the attatchment.
versatile jig for the amateur(04.02.2010)
There is no other jig for squaring up hammer hooks and polishing. It would be wise to view the AGI video as it is very helpful. The problem is that darn sear jig post.
I own a jewelry store and after reading the other posts I figured I had them beat because we own a laser welder. As soon as I got the jig I laser welded the back side. While lasering does not have a lot of depth it does fuse the surface.
What is good about this jig is that once you get the hammer squared away, you can mate the sear angle to the hammer. The final job looked like a textbook example and coating the sear with dykem blue and dry firing it showed everything was parallel. So far, so good. The trouble comes when you tighten that sear nut. If you only get the nut finger tight the sear will move during grinding. It is almost impossible not to overtighten the nut unless you are an expert in which case you don't need this jig at all.
On my second sear job the weld broke and the post pulled loose. I tried staking it but since it is hardened steel, I wasn't making a very big dent.
Called Brownells. The tech said to use Locktite green and, of course, they would replace it with no hassle but what's the use? Instead I am going to try lasering again only this time I will bevel the mating surfaces on both sides, insert steel wire into the beveled area and fuse it. That way the weld will have depth and be done on both sides. If that doesn't work, neither will Locktite.
Aside from the sear post challenge, it is a very cleverly designed jig and with some practice and possibly one or two ruined hammers, you can learn to do a very professional hammer and sear job. It may be an expensive and time consuming way to get things done, but it pays off in the satisfaction of learning how to repair you own 1911.
Incomplete Design(28.07.2012)
In theory this jig should work well. However the pin, as mentioned by others, is a problem. I wasn't able to tighten it enough to prevent the sear from moving. So I ruined a couple of parts as they moved during stoning before I gave up on using the jig.
After reading some of the other reviews I may try securing the sear stud with a set screw or pin - which is how the jig should have been made to begin with.
This is the first Brownells tool that I thought was poorly done.
For a hobbyist I would not recommend this jig. I would instead just pay for a trigger job by a reputable smith or buy drop in components.
Sear Pin Issue(31.07.2012)
The problem people are having with the sear pin pulling out is easily solved. The trick is to use two (2) nuts to hold the sear in place. I place one nut on the threaded pin and snug it down firmly on the sear using a drive socket held in my fingers. Then I place a second nut on the threaded pin and snug it down, locking the first nut and keeping it from coming loose. I have been using this fixture in this manner for two years and have stoned hundreds of sears without experiencing any problems. I really like this fixture for hammer prep. I have found no other jig that will produce 90 degree stoned hammer hooks. One warning: do not cut the sear relief angle until you have the sear face properly stoned. If you try to set the sear angle using the hammer and the sear has a relieved face, the sear face cut will be at the wrong angle!!
Sear Pin Fix(17.11.2013)
In a previous post, I suggested using two nuts to secure the sear and keep from pulling out the sear pin. Since then, I have developed a simple bullet-proof fix for the pin. First, thread on a 4-40 nut flush with the top of the pin. Then, tap the nut to start the pin moving out the rear of the sear holder. Once started, the pin comes out easily. Use a small punch to push out the pin once it is flush with the top of the sear holder. Then, countersink the pin hole on the back of the sear holder. Push a flat head 4-40 X 1" machine screw in from the back of the sear holder, checking to ensure that the screw head does not protrude from the rear of the sear holder. You can sand, stone or file the screw head if necessary to get it flush with the back of the sear holder. Remove the screw and degrease the screw and sear holder. Put a drop of Locktite 680 into the hole from the countersunk end. Push the machine screw in all the way and twist it until the locktite grabs it. Put a spacer of some kind (I just used an old sear) on the screw post and tighten it down lightly with a 4-40 nut. After 24 hours, remove the spacer and your sear fixture is ready to use. You can substitute your favorite glue or epoxy for the Locktite. It only needs to be strong enough to hold the screw until you get the nut started. An even simpler fix is to knock out the existing pin, degrease and Locktite 680 the original pin back into the hole. This method will work OK, but if you use the flat head screw fix you cannot pull out the pin!
trigger job done faster(05.12.2014)
I do have to say when I first used this I said some choice words at it. The sear stud did pull out on me and would not tighten so I took it out and used super glue on it and the staked the back of it three times and that solved the problem. After that I went ahead and started to stone the sear, it went fast and easy. I am very happy I purchased this I just wish they would of fixed the sear stud at the factory they even mention the problem in the instructions. Take your time fix the sear stud and read the instructions and I think you will be happy with this jig.
Good tool but you need to fix it first!(16.09.2016)
Like others have said, the small threaded stud that is pressed into the jig pulls out. This stud is pressed in but not secured with a flange or head of any type on the back side.
The first time I used this jig I snugged the nut (not over tightened as the instructions said) to hold the sear at the correct angle. I started stoning the sear and the sear moved, which changed the stoning angle. I reset the sear to the correct angle and snugged the nut again but this time I made it a little tighter. I could feel the stud pulling out of the jig.
I had to fix this thing before I could finish the job.
I drove the stud back in the jig so the non-threaded end extended out the back of the jig. I then used a small center punch directly on the non-threaded end of the stud to put a dimple in it. This enlarged the O.D. of the stud at the very end. This made a small flange that was .008" larger in diameter than the rest of the stud. I drove the stud back in the jig and made sure it was flush on the back side.
Problem fixed.
Good Tool But !(10.02.2017)
I purchased this tool to use when I am not in the shop because it is small and compact and appears well made. However it is a bit touchy and requires some real understanding of the two engagement surfaces hammer and sear. My issue is that the tool makes assumptions about the hammer / sear dimensions and angles that may not be correct. As stated by others if you begin with a hammer not properly prepped you will get a perfectly mated sear at the wrong angle. I believe the Brownells' hammer file is still the best way to square the hammer hooks. Then just smooth the hammer surfaces with a suitable polishing stone removing as little material as needed to ensure they are level. The concept is great the execution is lacking. It has the potential to be a really good tool when the design is fixed.
pictures misleading (17.06.2017)
I bought this jig for the soul purpose of squaring up the hooks on a 1911 hammer, I have a grate sear jig that I use and very happy with it but I need a jig that is used for the squaring the hooks, well this jig is very complicated there is nothing to hold the stone guide fast onto the jig and it moves so that the hammer hooks are not able to be squared, and the hammer stays lose on the hammer vice, it wasn't for me.
Finally a way to square the hammer hooks(06.05.2018)
The first time around youâll need to read the instructions look at the jig and probably read the instructions again. It does get easier after the first trigger job. The design is simple & elegant, one of those things that makes you wonder why didnât I think of this.
Before using the jig I took the Brownellâs hammer squaring file and got rid of the big tool marks, roughness, etc. This saves a lot of wear on the stones and on the jig. I purchased the three stones that are recommended and they work very well. Place the hammer in the jig and true up and polish the hammer hooks with the stones. The hooks end up dead square at 90°, something Iâve always struggled with before. Then set up the sear and cut the primary and secondary angles.
The first trigger I did came out with a 4 pound weight. I was able to easily go back to the jig and do a little more work on the hammer hooks and the sear face & that dropped the weight to just under 3 pounds.
I am thrilled to have this jig in my tool kit and feel it will save me enough time to easily pay for itself after two trigger jobs.
Référence: 080823000 BROWNELLS BOB MARVEL 1911 AUTO SEAR & HAMMER JIG Ref Fabricant: 15506050806102705 Ce jig à trois pièces, à double usage, offre des surfaces parfaitement meulées avec des coupes à 90° précises à chaque fois. Il guide la pierre sur tous les styles de marteaux et de gâchettes 1911 pour un déclenchement net de qualité match. Le jig/étau combiné maintient les marteaux à la bonne hauteur. De plus, il verrouille la gâchette dans la bonne relation avec le marteau pour effectuer des coupes primaires/secondaires nettes sur les surfaces d'engagement du marteau. Utilisez une pierre de 6" x ½" x ½".
204.9CHF0CHF 204.90
*
En rupture de stock, délai de livraison d'environ 4-12 semaines depuis l'entrepôt des États-Unis.
Three-piece, dual purpose jig gives perfectly stoned surfaces with exact 90° cuts every time. Guides stone over all styles of 1911 hammers and sears for a clean-breaking, match-quality let-off. Combination jig/vise holds hammers at the correct height. Plus, locks sear in proper relationship to hammer to make sharp primary/secondary cuts on hammer engaging surfaces. Use 6" x ½" x ½" stone.
Design Unique Maintient à la Fois la Gâchette & le Marteau
Ce jig à trois pièces, à double usage, offre des surfaces parfaitement meulées avec des coupes à 90° précises à chaque fois. Il guide la pierre sur tous les styles de marteaux et de gâchettes 1911 pour un déclenchement net de qualité match. Le jig/étau combiné maintient les marteaux à la bonne hauteur. De plus, il verrouille la gâchette dans la bonne relation avec le marteau pour effectuer des coupes primaires/secondaires nettes sur les surfaces d'engagement du marteau. Utilisez une pierre de 6" x ½" x ½".
SPÉCIFICATIONS : Aluminium durci et anodisé. Environ 4" (10,1 cm) de long, 2" (5 cm) de haut, ¾" (19 cm) d'épaisseur. Comprend des instructions.
Plus...
Évaluations client de BROWNELLS BOB MARVEL 1911 AUTO SEAR & HAMMER JIG
Nombre d'évaluations: 12
De brownells.com: 12
Note moyenne: 3.6
MARVEL HAMMER & SEAR JIG(02.10.2009)
This jig has a problem. When you lightly tighten the sear to the jig, the pin pulls out of the block. I ended up having to drill a hole and thread it. Then placed a threaded plug, which fit against the pin and secured it in place.
Plus it's hard to square hammer hooks when the block is not square. However, after the modification on the pin the sear cuts are clean and smooth.
Needs one improvement(06.12.2009)
I had to add a pin to the sear jig to prevent the threaded rod from pulling out when tightening the nut to secure the sear. The instructions warn you about this happening but it's inevitable - you can't tighten the nut enough to keep the sear in position when stoning, without pinning this rod. I used an ejector roll-pin and cut it to length after installing.
Marvel sear jig can be easily fixed(18.12.2009)
Yes, the sear pin pulls out of the sear attatchment, I found this is easily fixed if you are familiar with staking a hammer strut pin. I staked the threaded pin after using it a few times and the pin started to pull through. Clean the end of the pin and the inside of the hole where the pin is attatched, I put a small amount of 2 part metal epoxy on the end of the pin and staked it on the back side using a standard punch, cleaned up the raised portions of the staked pin, ground it smooth and flat so it wont scratch the jig body. 5 trigger jobs later and the pin has not moved yet. I found the trick is to NOT torque the nut so that the pin has a chance to pull through, I believe it does not take that much to secure the sear to the attatchment.
versatile jig for the amateur(04.02.2010)
There is no other jig for squaring up hammer hooks and polishing. It would be wise to view the AGI video as it is very helpful. The problem is that darn sear jig post.
I own a jewelry store and after reading the other posts I figured I had them beat because we own a laser welder. As soon as I got the jig I laser welded the back side. While lasering does not have a lot of depth it does fuse the surface.
What is good about this jig is that once you get the hammer squared away, you can mate the sear angle to the hammer. The final job looked like a textbook example and coating the sear with dykem blue and dry firing it showed everything was parallel. So far, so good. The trouble comes when you tighten that sear nut. If you only get the nut finger tight the sear will move during grinding. It is almost impossible not to overtighten the nut unless you are an expert in which case you don't need this jig at all.
On my second sear job the weld broke and the post pulled loose. I tried staking it but since it is hardened steel, I wasn't making a very big dent.
Called Brownells. The tech said to use Locktite green and, of course, they would replace it with no hassle but what's the use? Instead I am going to try lasering again only this time I will bevel the mating surfaces on both sides, insert steel wire into the beveled area and fuse it. That way the weld will have depth and be done on both sides. If that doesn't work, neither will Locktite.
Aside from the sear post challenge, it is a very cleverly designed jig and with some practice and possibly one or two ruined hammers, you can learn to do a very professional hammer and sear job. It may be an expensive and time consuming way to get things done, but it pays off in the satisfaction of learning how to repair you own 1911.
Incomplete Design(28.07.2012)
In theory this jig should work well. However the pin, as mentioned by others, is a problem. I wasn't able to tighten it enough to prevent the sear from moving. So I ruined a couple of parts as they moved during stoning before I gave up on using the jig.
After reading some of the other reviews I may try securing the sear stud with a set screw or pin - which is how the jig should have been made to begin with.
This is the first Brownells tool that I thought was poorly done.
For a hobbyist I would not recommend this jig. I would instead just pay for a trigger job by a reputable smith or buy drop in components.
Sear Pin Issue(31.07.2012)
The problem people are having with the sear pin pulling out is easily solved. The trick is to use two (2) nuts to hold the sear in place. I place one nut on the threaded pin and snug it down firmly on the sear using a drive socket held in my fingers. Then I place a second nut on the threaded pin and snug it down, locking the first nut and keeping it from coming loose. I have been using this fixture in this manner for two years and have stoned hundreds of sears without experiencing any problems. I really like this fixture for hammer prep. I have found no other jig that will produce 90 degree stoned hammer hooks. One warning: do not cut the sear relief angle until you have the sear face properly stoned. If you try to set the sear angle using the hammer and the sear has a relieved face, the sear face cut will be at the wrong angle!!
Sear Pin Fix(17.11.2013)
In a previous post, I suggested using two nuts to secure the sear and keep from pulling out the sear pin. Since then, I have developed a simple bullet-proof fix for the pin. First, thread on a 4-40 nut flush with the top of the pin. Then, tap the nut to start the pin moving out the rear of the sear holder. Once started, the pin comes out easily. Use a small punch to push out the pin once it is flush with the top of the sear holder. Then, countersink the pin hole on the back of the sear holder. Push a flat head 4-40 X 1" machine screw in from the back of the sear holder, checking to ensure that the screw head does not protrude from the rear of the sear holder. You can sand, stone or file the screw head if necessary to get it flush with the back of the sear holder. Remove the screw and degrease the screw and sear holder. Put a drop of Locktite 680 into the hole from the countersunk end. Push the machine screw in all the way and twist it until the locktite grabs it. Put a spacer of some kind (I just used an old sear) on the screw post and tighten it down lightly with a 4-40 nut. After 24 hours, remove the spacer and your sear fixture is ready to use. You can substitute your favorite glue or epoxy for the Locktite. It only needs to be strong enough to hold the screw until you get the nut started. An even simpler fix is to knock out the existing pin, degrease and Locktite 680 the original pin back into the hole. This method will work OK, but if you use the flat head screw fix you cannot pull out the pin!
trigger job done faster(05.12.2014)
I do have to say when I first used this I said some choice words at it. The sear stud did pull out on me and would not tighten so I took it out and used super glue on it and the staked the back of it three times and that solved the problem. After that I went ahead and started to stone the sear, it went fast and easy. I am very happy I purchased this I just wish they would of fixed the sear stud at the factory they even mention the problem in the instructions. Take your time fix the sear stud and read the instructions and I think you will be happy with this jig.
Good tool but you need to fix it first!(16.09.2016)
Like others have said, the small threaded stud that is pressed into the jig pulls out. This stud is pressed in but not secured with a flange or head of any type on the back side.
The first time I used this jig I snugged the nut (not over tightened as the instructions said) to hold the sear at the correct angle. I started stoning the sear and the sear moved, which changed the stoning angle. I reset the sear to the correct angle and snugged the nut again but this time I made it a little tighter. I could feel the stud pulling out of the jig.
I had to fix this thing before I could finish the job.
I drove the stud back in the jig so the non-threaded end extended out the back of the jig. I then used a small center punch directly on the non-threaded end of the stud to put a dimple in it. This enlarged the O.D. of the stud at the very end. This made a small flange that was .008" larger in diameter than the rest of the stud. I drove the stud back in the jig and made sure it was flush on the back side.
Problem fixed.
Good Tool But !(10.02.2017)
I purchased this tool to use when I am not in the shop because it is small and compact and appears well made. However it is a bit touchy and requires some real understanding of the two engagement surfaces hammer and sear. My issue is that the tool makes assumptions about the hammer / sear dimensions and angles that may not be correct. As stated by others if you begin with a hammer not properly prepped you will get a perfectly mated sear at the wrong angle. I believe the Brownells' hammer file is still the best way to square the hammer hooks. Then just smooth the hammer surfaces with a suitable polishing stone removing as little material as needed to ensure they are level. The concept is great the execution is lacking. It has the potential to be a really good tool when the design is fixed.
pictures misleading (17.06.2017)
I bought this jig for the soul purpose of squaring up the hooks on a 1911 hammer, I have a grate sear jig that I use and very happy with it but I need a jig that is used for the squaring the hooks, well this jig is very complicated there is nothing to hold the stone guide fast onto the jig and it moves so that the hammer hooks are not able to be squared, and the hammer stays lose on the hammer vice, it wasn't for me.
Finally a way to square the hammer hooks(06.05.2018)
The first time around youâll need to read the instructions look at the jig and probably read the instructions again. It does get easier after the first trigger job. The design is simple & elegant, one of those things that makes you wonder why didnât I think of this.
Before using the jig I took the Brownellâs hammer squaring file and got rid of the big tool marks, roughness, etc. This saves a lot of wear on the stones and on the jig. I purchased the three stones that are recommended and they work very well. Place the hammer in the jig and true up and polish the hammer hooks with the stones. The hooks end up dead square at 90°, something Iâve always struggled with before. Then set up the sear and cut the primary and secondary angles.
The first trigger I did came out with a 4 pound weight. I was able to easily go back to the jig and do a little more work on the hammer hooks and the sear face & that dropped the weight to just under 3 pounds.
I am thrilled to have this jig in my tool kit and feel it will save me enough time to easily pay for itself after two trigger jobs.